Microsoft Dynamics 365 Business Central is a powerful platform designed to help businesses manage various aspects like finance, operations, and supply chain. One key feature in Business Central is the ability to create multiple companies within the same environment. Whether you are creating a brand new company or setting up an existing one, Business Central provides an easy way to do so. This guide will walk you through the process of creating a completely new company in Business Central without sample data.
1. Log In to Business Central
When you first log into Business Central, the default company environment is set to CRONUS, which is a sample company with preloaded data. You can explore all the features in Business Central by interacting with this sample company. However, if you need to create your own company, follow these steps.
2. Access the Companies Page
To start creating your company, follow these steps:
- Click on the Search tab (the magnifying glass icon at the top right corner of the screen).
- Type Companies in the search bar.
- From the results, click on the Companies option under Pages and Tasks.
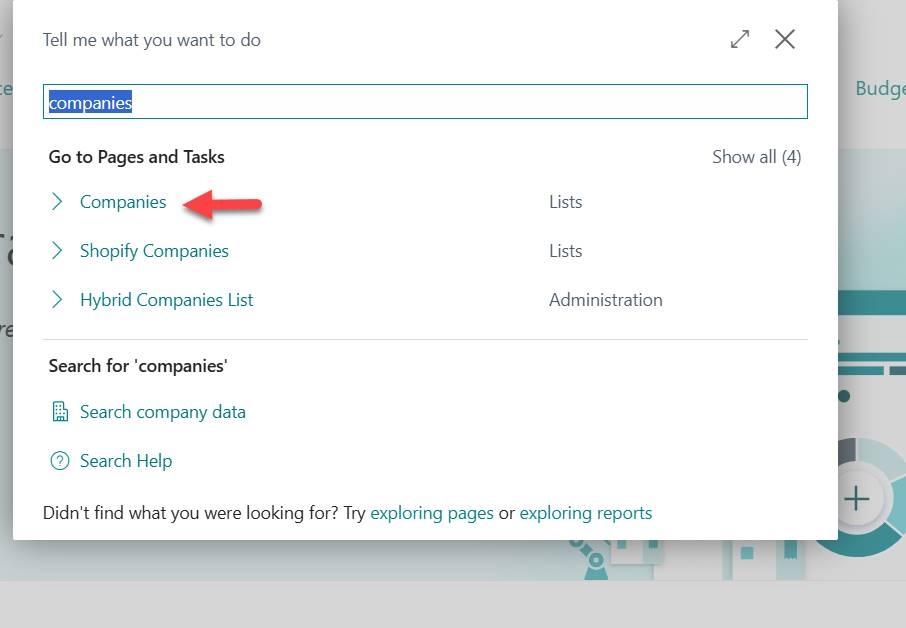
This will take you to the Companies List Page, where you can manage all companies within your Business Central environment.
3. Create a New Company
In the Companies page, follow these steps:
- Click on the downwards arrow head next to New tab.
- Select Create New Company from the available options.
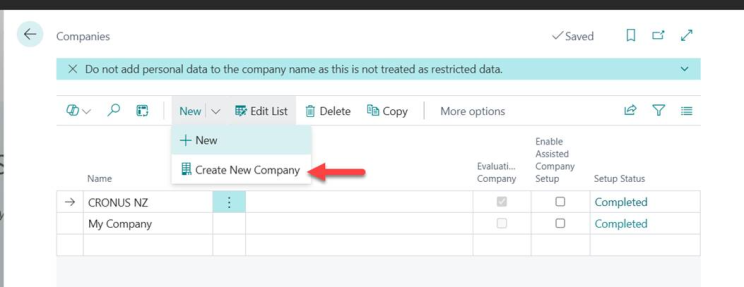
At this point, an Assisted Setup Guide will appear, walking you through the process. Click on the Next button to proceed.
4. Enter Company Details
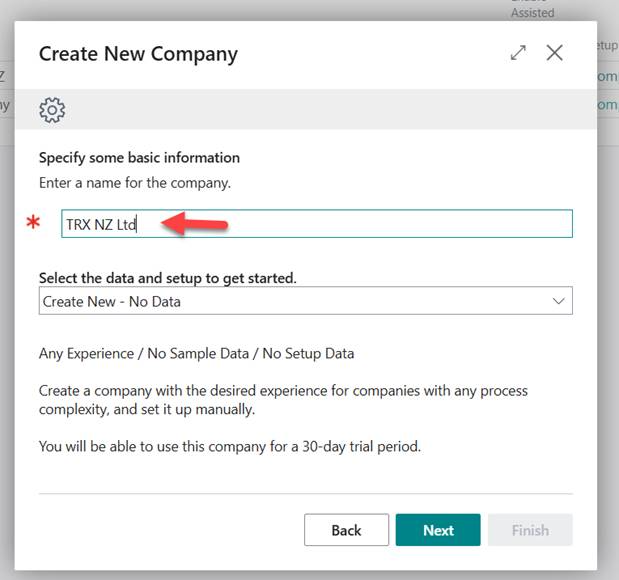
In this step, you’ll need to enter the name of the new company. After entering the company name, you’ll have to choose the data template for the company’s setup.
5. Select Data Setup Template
There are three setup templates you can choose from, depending on your needs:
- Create New – No Data: Select this option if you are creating a company from scratch.
- Production – Setup Data Only: This option includes setup data like the chart of accounts, payment methods, and financial reports, but it does not include any sample data.
- Evaluation – Contoso Sample Data: This template provides a sample company similar to CRONUS, complete with setup data, sample data, and configurations.
For this example, we will choose the Create New – No Data option. After making your selection, click Next.
6. Optional: Add Users to the New Company
Next, you’ll be prompted to add users to the new company. While this step is optional and can be done later, you can choose to proceed with it now. If you skip this step, you can always manage users later.
Click Next when you’re ready to continue.
7. Select Users and Grant Access
If you chose to add users, a list of all users currently using Business Central will appear. You can select users and assign them access to the new company. Once done, click Next to proceed.
8. Complete the Setup
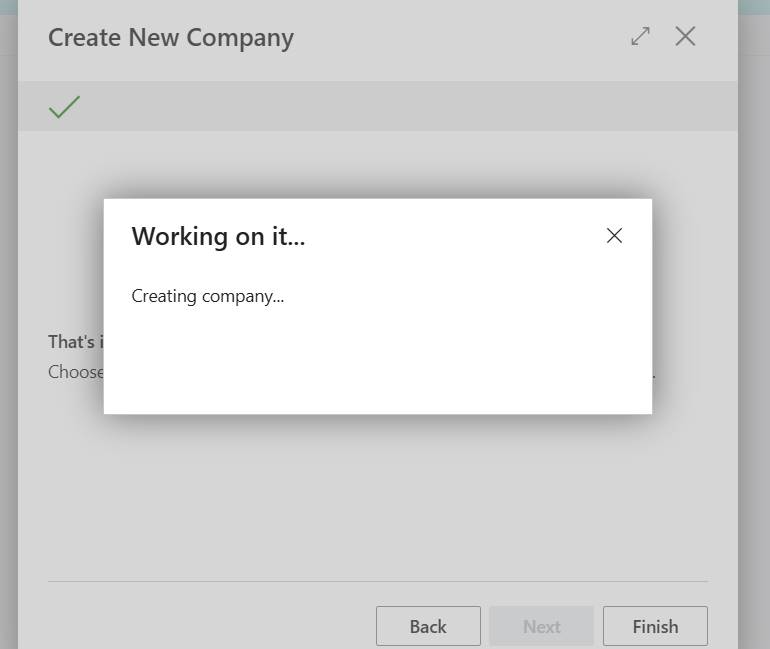
The system will now create the new company. This may take a few minutes, so please be patient. Once the process is complete, click on Finish.
9. Access Your Newly Created Company
To view your newly created company, follow these steps:
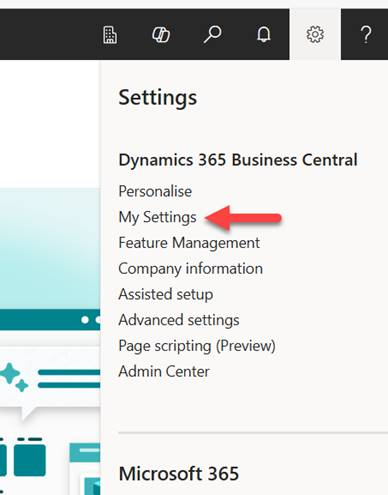
- Click on the Settings cogwheel at the top right-hand corner of the screen.
- Go to My Settings.
- Go to company and click on the ellipsis (…) next to company and select the newly created company name from the list.
This will launch a setup wizard for the new company. Accept the Terms and Conditions and click Next.
10. Switch to Your New Company
Once you’ve accepted the Terms and Conditions, Business Central will switch to your new company’s environment. You can now begin using your newly created company for your business operations.
By following these steps, you can set up a new company with or without sample data, ensuring you have the right environment for your business needs. Whether you’re starting from scratch or using pre-configured templates.
Thank you for reading.
Shanika Ranathunga


